1. Planner Overview
The TickPace planner is a category-based task board designed to group projects, study plans, personal errands, and long-term goals in one place.
With category cards, chronological plan lists, and a desktop widget, you always know what’s next—without juggling separate tools.
2. Key Highlights
- Smart categories: create boards for work, study, life, and wellness.
- Plan counts: every card shows how many items remain.
- Chronological lists: each plan displays its target date and description.
- Today focus: highlight what needs attention right now.
- Desktop view: pin plans to your screen for real-time visibility.
- Date navigation: swipe through yesterday or tomorrow’s plans.
- Fast editing: rename or delete categories anytime.
- Display control: choose which categories appear on the desktop widget.
3. Core Features
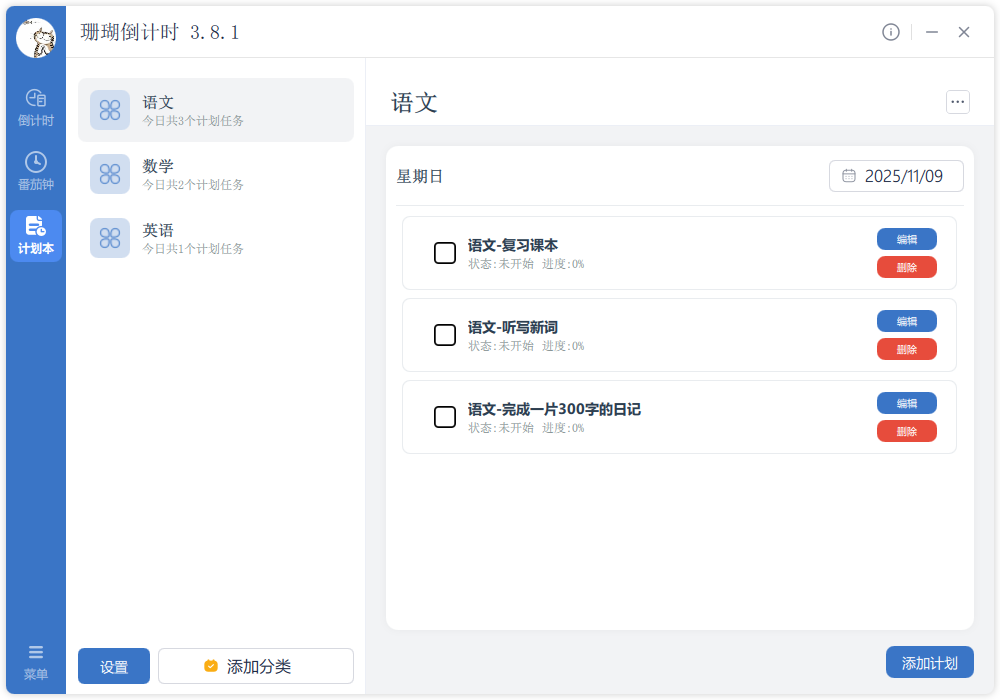
3.1 Category Board
The board view keeps every category at a glance. Each card shows:
Name
Label themes like Work, Study, Personal, Wellness, etc.
Plan count
See how many tasks live in each category.
💡 Category ideas
Create up to 5–8 focused categories:
- Work: projects, meetings, deadlines.
- Study: courses, exam prep, certifications.
- Life: errands, home care, personal tasks.
- Health: workouts, appointments, routines.
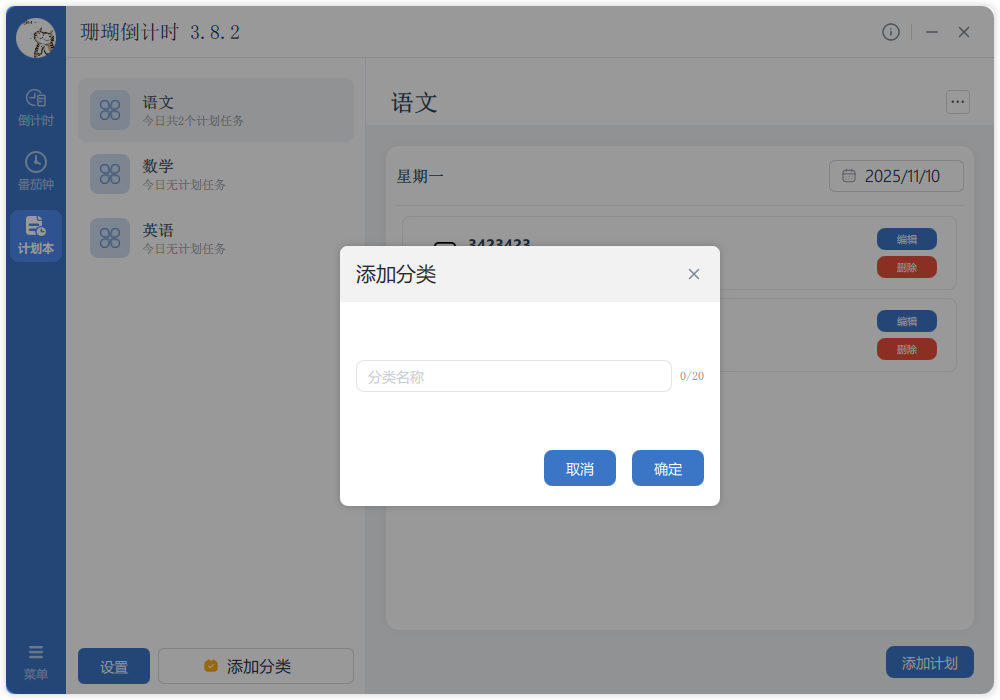
3.2 Add Categories
Create new categories in a few clicks:
-
Click “Add Category”
Use the button on the board view.
-
Name it
Choose a concise title that’s easy to spot.
-
Confirm
Save to add the card to your board.
⚠️ Notes
- Names can’t be blank.
- Keep titles short for easier scanning.
- Too many categories slow you down—stick to essentials.
3.3 Category Details
Select any card to manage everything inside:
✏️ Rename
Update titles whenever priorities shift:
-
Choose “Edit Category”
Open the action menu inside the card.
-
Enter a new name
Use clear language for quick recognition.
-
Save
Confirm changes to update the board.
🗑️ Delete
Remove unused categories to stay lean:
- Use the “Delete Category” action.
- Confirm to avoid accidental removal.
- Deleting a category also removes its plans—export first if needed.
3.4 Plan List
Inside each category, the plan list keeps tasks organized:
📅 Chronological order
Plans sort by date so you always see what’s coming next.
⭐ Today highlights
Tasks due today are styled differently to draw your attention.
💡 Plan management tips
- Assign a date to every plan for clarity.
- Review the list regularly to track progress.
- Complete or reschedule overdue tasks quickly.
- Lean on the “Today” highlight to stay focused.
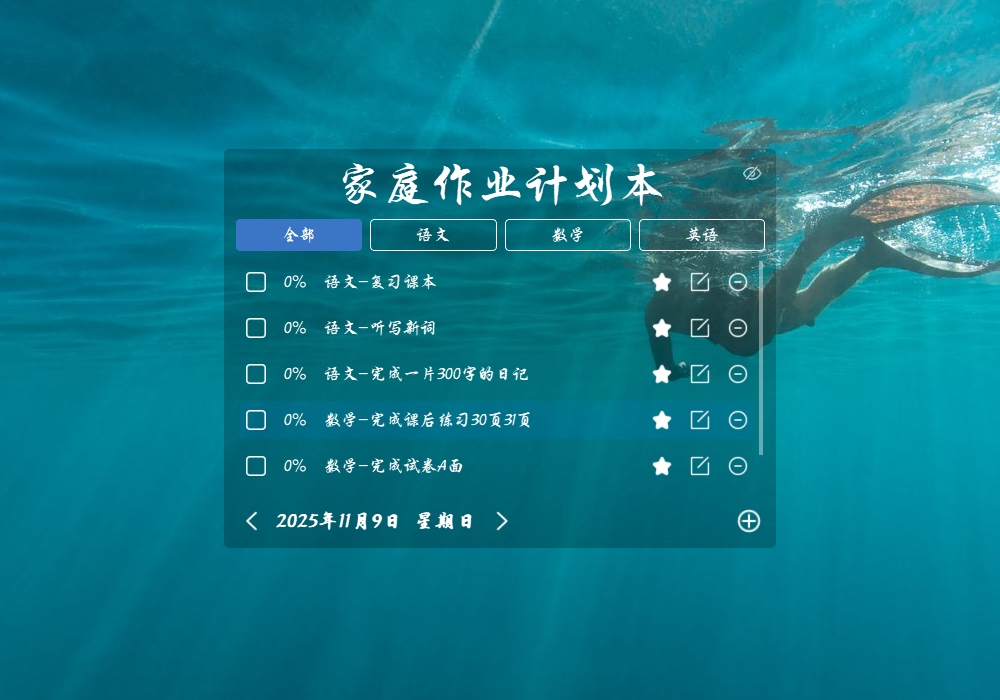
3.5 Desktop View
The desktop window mirrors your plans outside the main app:
📆 Date header
Shows today’s full date and weekday.
⬅️➡️ Navigation
Jump to yesterday or tomorrow without opening the main app.
📂 Category filter
Only show categories you’ve toggled on for the desktop.
📝 Plan list
View tasks for each category at a glance.
💡 Desktop tips
- Dock the window near the screen edge for quick checks.
- Limit the desktop categories to reduce clutter.
- Review yesterday to confirm everything was completed.
- Peek at tomorrow to prep materials ahead of time.
3.6 Settings
Customize the planner to your workflow:
- Desktop title: rename the window header.
- Show/Hide window: toggle the widget on demand.
- Weekend mode: group Friday–Sunday as weekend plans.
- Auto-carry over: move unfinished tasks to the current day automatically.
4. How to Use
4.1 Create categories
-
Open the planner
Launch the Planner module from the main app.
-
Click “Add Category”
Use the button above the board.
-
Name it
Enter titles such as Work, Study, Life, etc.
-
Save
Confirm to create the new board.
4.2 Add plans
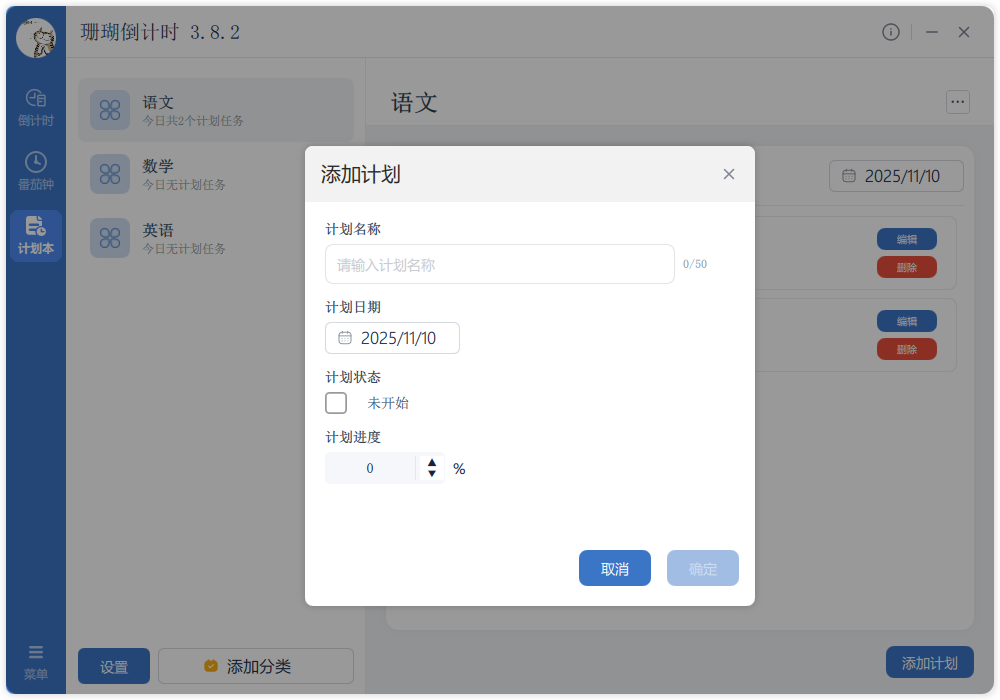
-
Open a category
Click any card to view its plans.
-
Select “Add Plan”
Use the button within the list.
-
Describe the task
Add clear instructions or outcomes.
-
Pick a date
Choose today, tomorrow, or any future date.
-
Save
Commit the plan to the list.
4.3 Manage categories
-
Open the category
Click the card to access controls.
-
Toggle desktop display
Switch on/off the desktop visibility toggle.
-
Edit the name
Use the edit button to rename.
-
Delete (optional)
Remove unused categories from the board.
4.4 Use the desktop view
-
Enable the widget
Turn on the desktop display in settings or click “Show Desktop Window”.
-
Review today
The widget defaults to today’s date and tasks.
-
Browse other days
Use the arrows to move to previous or next days.
-
Move the window
Drag it anywhere on your desktop for easy access.
5. Tips & Notes
💡 Category hygiene
Keep your board tidy:
- Right count: 5–8 categories is the sweet spot.
- Naming: short, specific titles improve scanning.
- Purpose: map categories to work, study, life, wellness.
- Cleanup: prune or merge categories each month.
💡 Adding plans
Boost completion rates:
- Be specific: describe the action and outcome.
- Choose realistic dates: avoid overbooking.
- Prioritize: pin important plans to the top.
- Update often: mark done or reschedule immediately.
💡 Desktop workflow
Make the widget work for you:
- Placement: dock it along the screen edge.
- Visibility: only show categories you monitor daily.
- Morning review: glance at today before you start.
- Preview tomorrow: prep materials ahead of time.
💡 Time management
Blend the planner with your routines:
- Daily wrap-up: review accomplishments nightly.
- Weekly planning: map major goals every Monday.
- Monthly goals: reset objectives at the start of each month.
- Stay flexible: shift dates when priorities change.
⚠️ Notes
- Deleting a category removes its plans—backup if needed.
- Export or sync regularly to avoid data loss.
- Too many categories create noise; keep the board lean.
- Write actionable plan descriptions.
- Keep lists current by completing or rescheduling promptly.